Miscellaneous
Beginners Guide to Cross Stitch Embroidery
A Rewarding Craft
USPA NEWS -
Cross stitch is one of the easiest and most rewarding hobbies around. Anyone, young or old, can create beautiful works of art with little to no experience. The key to enjoying your project is to know the best and most efficient ways to work.
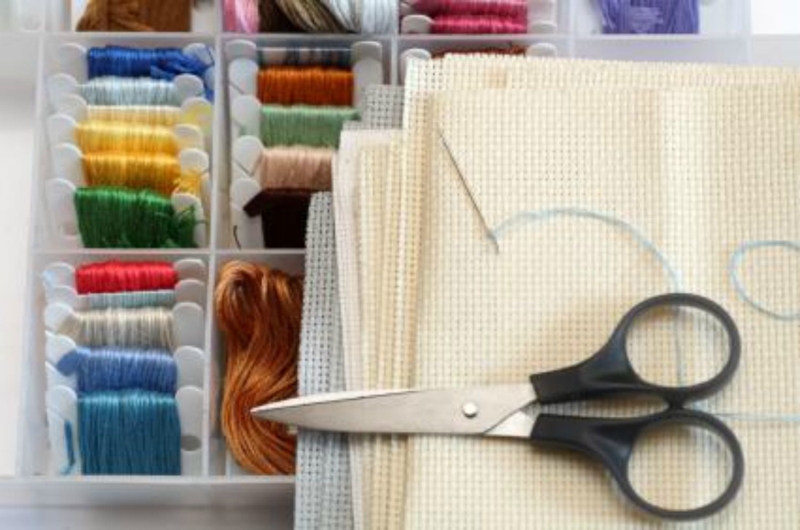
Some of the basic supplies you will need to start a project are a pattern, fabric, needles, six strand embroidery thread (floss) and scissors. Other helpful tools would be embroidery hoops, needle threader, washable fabric marker and masking tape. Aida cloth is the most popular fabric for cross stitchers. When looking for aida cloth, you will see different counts. The most popular are 11 to 18 count, which means 11 stitches per inch up to 18 stitches per inch. Having 11 stitches in an inch of fabric means larger stitches. Then having 18 stitches in an inch will have smaller stitches. Use what you are more comfortable with. With my older eyes, I prefer 11 count aida. It is easier for me to see. You can find kits with all necessary supplies online and there are many free patterns if you already have the supplies you need on hand. I often search online for free patterns and have a color printer to print them out.
2. For a full-canvas design (one that covers all the squares in stitches) begin stitching from the upper left-hand corner of the design. Allow for a three-inch border on all sides of the design to aid in the finishing of your completed piece. For example, if your finished design is 12 in. x 14 in. you would purchase an 18 in. x 20 in. piece of fabric.
If the design you have chosen does not cover all the squares, you can begin in the center of the design and work outwards. You will still want a 3 inch border on all sides. To find the center of your fabric, fold it in half lengthwise and crosswise. Mark the center point where the two fold lines meet with a pin. The center arrows on your chart will correspond to the fold lines on your fabric. The center square at the center of your chart corresponds to the position of your pin. You can then begin stitching from the center point. When working with a large pattern, working from the center is much easier than constantly counting squares to find the point where you need to be. Small projects, like one you may make for a four inch by six inch frame, the area can be counted much easier.
If the design you have chosen does not cover all the squares, you can begin in the center of the design and work outwards. You will still want a 3 inch border on all sides. To find the center of your fabric, fold it in half lengthwise and crosswise. Mark the center point where the two fold lines meet with a pin. The center arrows on your chart will correspond to the fold lines on your fabric. The center square at the center of your chart corresponds to the position of your pin. You can then begin stitching from the center point. When working with a large pattern, working from the center is much easier than constantly counting squares to find the point where you need to be. Small projects, like one you may make for a four inch by six inch frame, the area can be counted much easier.
3. To begin stitching, cut your thread to a workable length. I usually cut off about 18 inches. Separate two threads off of the group of six threads. Thread your needle with those two strands of embroidery floss for fabric counts of 10 to 18 stitches per inch.
4. (Expert way) When you begin stitching, leave a long enough tail on the back side of your work so you can hold it in place as you stitch over it. This secures your thread. Do not tie a knot in your thread. (My way) I do knot my thread. For items that will be handled quite a bit while stitching or will be used and washed regularly, I use knots when starting and ending my thread. I often embroider pillowcases, clothing and other things that get used and washed.
4. (Expert way) When you begin stitching, leave a long enough tail on the back side of your work so you can hold it in place as you stitch over it. This secures your thread. Do not tie a knot in your thread. (My way) I do knot my thread. For items that will be handled quite a bit while stitching or will be used and washed regularly, I use knots when starting and ending my thread. I often embroider pillowcases, clothing and other things that get used and washed.
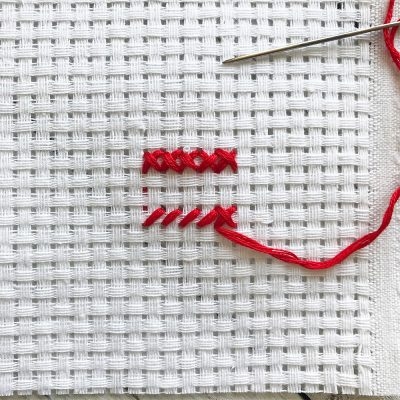
6. A single stitch is worked by bringing the needle out at the lower left-hand corner of the woven square and inserting it at the upper right-hand corner, bring the needle out again at the lower right-hand corner and insert at the upper left-hand corner to complete the stitch.
7. To do a row of cross stitches in the same floss color, bring the needle out at the lower left-hand corner of the square, insert at the upper right-hand corner, bring it out directly below the previous stitch, and continue in this manner until the desired stitches are done. You will have a row of slanted stitches. Work back completing the square by bringing the needle out at lower right-hand corner, insert at diagonally one square over, out again directly below, etc.
8. For a smoother stitch, use the Push Pull Method by pushing your needle and thread straight through the fabric, coming up from the back for your next stitch. Do not use the Sewing Method because it causes an uneven raised effect.
9. To finish off the thread, (expert way) on the backside of your fabric, run the needle under 5 or 6 stitches to secure the thread. As explained above, I knot my threads for items that get used and washed. Cut the thread close to the cloth so there will not be loose strands of thread that could get caught up in other stitches.
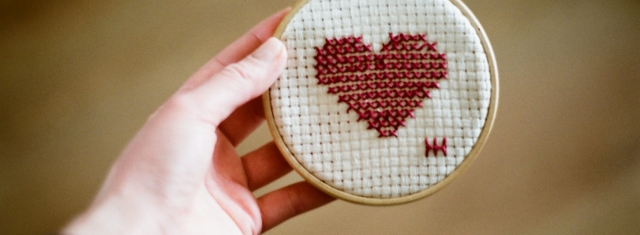
My ending tips – start small. Those large, beautiful designs are tempting, but not for a first project. A simple heart or flower are simple starter projects and make a great little gift. If you want to make some of your own designs, get some graph paper and keep it on hand. It works wonderfully for making your own patterns. In addition to finding free patterns online, there are websites you can use to turn photos into cross stitch patterns. Personally, I like using FlossCross. Lastly, have fun and have patience. Like with everything else, you will get better with each new project.
Thank you for reading my article. You can check out my website – Small Village Life at smallvillagelife.com, where I share useful articles and news.
Wendy writes for the United States Press Agency and is a former columnist with the Fulton County Expositor, Wauseon, Ohio.
Wendy writes for the United States Press Agency and is a former columnist with the Fulton County Expositor, Wauseon, Ohio.
more information: https://smallvillagelife.com
Liability for this article lies with the author, who also holds the copyright. Editorial content from USPA may be quoted on other websites as long as the quote comprises no more than 5% of the entire text, is marked as such and the source is named (via hyperlink).